Thursday, January 30, 2014

DIY Disinfectant Wipes

My DIY Disinfectant Wipes Recipe

Everyone does things differently and I am no exception. I choose the natural route first............ I really liked how these wipes turned out and they seem to be effective.

Ingredients
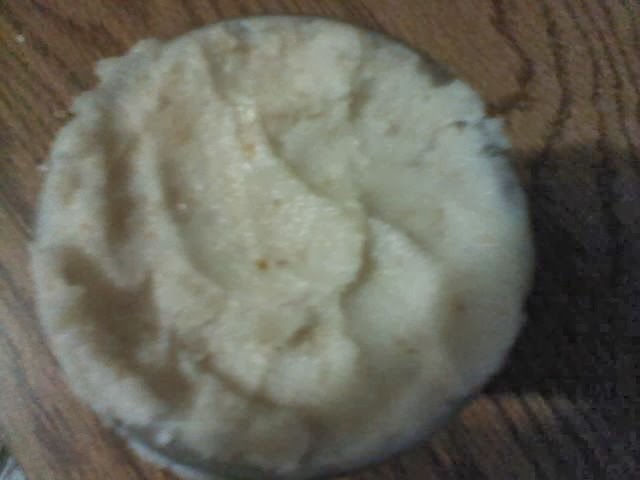
Container of your choice to mix your solution in. I used an old coconut oil container because that was what was available to me at the moment.
50%  Purified H2O
50% White Vinegar
10 drops of Peppermint Essential Oil
10 drops of Eucalyptus Essential Oil
Bounty Paper Towels or you could also go with old cotton tshirts cut up
I am a tad bit ocd so I used an old flushable wipes container. I folded each one of my paper towels and filled my container. I poured just enough of my liquid to fill up half of the container. Let it sit 10 min and then turned it upside down for 10 min and I was good to go!

To each their own, but I really liked this recipe and it works for me so I thought I would share. :)
Happy Disinfecting lol

Thursday, January 23, 2014

Crochet 100% Cotton Reusable Facial Cleansing Pads!!!!

Hi Everyone!!!
I am so excited about my latest crochet project! The inspiration for this came from me cleaning my face lol I always grab a washcloth and don't get me wrong it gets the job done, but I always find that it is to big for the job at hand. I decided to make my own mini washcloth just for washing my face. These pads are 3 1/2" and they are perfect for just washing my face. The best part, they are completely reusable :) Meaning I can wash them and reuse them, that makes me a happy camper. Since I decided to go to all natural products, this is an awesome alternative to any of those nasty toxin filled facial wipes and pads that are bought from the store. I make my own facial cleanser to go right along with these little pads.
Stay tuned ! There will be a blog with DIY Facial Cleaner coming soon!!!
Don't forget you can find me on Pinterest and on Facebook at Momma's Time Out

Update on my venture into Knitting

So if you remember right about a week ago I told you all that I taught myself a new skill. Knitting, well I am happy to say that even though it took me forever and I mean forever I did finally finish a knitting project. This is my first project and most definitely will not be my last. I really enjoyed  it.
Once I get really good at it, I will post some tutorials that I think will be helpful for those who are crocheters that want to learn to knit. It is not as hard as everyone says it is.
Share Away!!!! Don't forget you can find me on Facebook at Momma's Time Out or follow me on Pinterest!

Sunday, January 19, 2014

DIY Mouse Repellant Recipe

DIY Mouse Repellant Recipe

At one time or another we all have had an issue with mice. If you live where I do then you encounter this issue every year. I have my own way of repelling them, this may work for some folks and may not for others. This is safe for humans and animals and will only be effective if you use 100% pure peppermint oil.

Ingredients
Water bottle (dollar store)
15 drops of 100% pure organic peppermint essential oil
H2O

I fill my spray bottle up with water, put in the 15 drops of peppermint oil and shake before I spray the areas I where I frequently see mice. You can also use the peppermint oil on cottonballs and place them in the areas where mice are seen. Either way you will still have to spray or change out your cotton balls a few times a week. This does work though and it is not harmful to kids or pets.
Don't forget to like my facebook page Momma's Time Out and follow me on Pinterest !
:)

DIY Headache Relief Cream

DIY Headache Relief Cream

I have done a ton of research on headache and migraine relief and I went with the supplies that I have available to me right now. 

Ingredients
4 tablespoons of Coconut Oil
10 drops of Peppermint Essential Oil

Stir very well and store. 

Unfortunately I have had a horrible migraine all day and finally came to the conclusion that I had to try something because I can't take the pain any longer. I whipped this up and applied to my neck and my temples. It has only been on for approximately 10 minutes and I can already feel the headache easing a bit. For that I am thankful and that is enough for me to share this with you. Just easing the pain is success in my book. 
Don't forget to like Momma's Time Out on Facebook and Follow me on Pinterest! :)

Saturday, January 18, 2014

My First Time Crocheting With Thread

Crocheting with Thread was a Success!!!!!
I thought I would share with you another skill that I have added to my arsenal of skills. ;) This one takes extreme patience and advanced crochet skill. (In My Opinion) It is much more difficult to crochet with thread than it is with yarn. I would say though that if you have the patience and you are fairly good at crochet, you should give this a try. It is extremely rewarding once you have finished a project. Below are pictures that I took of my very first thread project. The first two are with the flash (so you can see the detail) and the last one is without the flash, so you can see the actual color.


Don't forget to check out my Pinterest and my facebook page Momma's Time Out :) 

Thursday, January 16, 2014

DIY Liquid Fabric Softener

DIY Liquid Fabric Softener

Ok so a few years ago I started making my own laundry soap, but I could not find a liquid fabric softener recipe that was HE friendly. I found one and it works great for us.

Ingredients
2 cups of hair conditioner
3 cups of white vinegar
6 cups of hot water

Stir together until smooth and put into container. I used an old vinegar bottle. Look below for a little something extra :)

Dryer Sheets!!! 
Yes it is possible and these worked great for us as well. I used an old cool whip container. I put a brand new set of coffee filters in the cool whip container and poured some of the fabric softener I made directly into the container. I shook the container really well and Wa La!!!!!!! You have dryer sheets and they are reusable. 

At my house we do our best to save money without sacrificing quality. This is not completely toxin free but pretty darn close. Once I get some organic hair conditioner it will be completely toxin free. I hope you enjoyed my post!!! Don't forget to like my facebook page Momma's Time Out and follow me on Pinterest!!! :)

DIY Diaper Rash Cream

DIY Diaper Rash Cream

Everyone uses this stuff at one point and time if you have little ones. Usually it is the store bought stuff that harbors a ton of chemicals......... This does not have any chemicals in it and it requires 2 ingredients... Let's get started.

First off you can use whichever type of container you prefer, the one pictured above was one of the first ones I made. This was about 3 or 4 years ago. I now prefer to store all of my products in glass containers. You can get plastic that is bpa free though, the one in the pic above is bpa free.

Ingredients
5 tablespoons of Coconut Oil ( I use tropical traditions gold label)
10 drops of TeaTree essential oil ( I use plant therapy)

Mix together well. Label. Store in relatively cool area, it will liquify if stored in a warm area. 

That's it a great toxic free cream. 
*Always consult with your physician before trying anything new* 

Monday, January 13, 2014

DIY Deodorant

DIY Deodorant :)

I know, I know, you are thinking lady you are nuts!!! I assure you I am not and this stuff seriously works. This is coming from a lady who gets the hot flashes like crazy and has a house full of men and boys. (sweaty)

There are a ton of recipes like this online, so I encourage you to do your research to see what will work best for your family. This works for ours. That is why I am sharing.

Ingredients
1/4 cup Baking Soda
1/4 cup Cornstarch
6 - 8 Tablespoons of Coconut Oil
I mixed my baking soda and cornstarch first and then smooshed in my coconut oil. You can add essential oils if you like, but I did not. I use Tropical Traditions Gold Label coconut oil, it has a light coconut scent on its own and I love the smell of coconut so I left it how it was.
I then put it into my containers, which I saved from deodorant that I had purchased previous to trying to find my own recipe for a toxin free one. 
Enjoy!!!!!!!

Crochet Tutorial- DIY Tshirt Rug

DIY T-Shirt Rug Crochet
Ok, first let me tell you this is a very simple and easy project. I started by just crocheting the shirt with one of my large crochet hooks, that does not work out very well. At least it did not for me, so I decided to try this a different way and luckily it worked so I am sharing my failure with you and my success. I know this is the ugliest rug you have ever seen!! Me to, but I want to reuse and recycle things that I wouldn't normally, so these are old shirts and scrap yarn. If you look into the center of this first picture (below) you will see that I started out with just the shirt (my failure). The rest was a blazing success, here is why..........


When I started this rug, it is just simple half double crochet to the length I wanted and worked around the first row to make the elongated circular pattern that you see.................. The half double crochet stitch is worked around in circular motion throughout this project. This is simple enough though that you can do whatever style rug you prefer. Ok now I am going to show you how I worked the stitch. First when you make your loop in the beginning, make it with both the shirt and the yarn........ both pieces need to be together throughout the process. Ok so I already have some worked up for you to see, the tshirt is in the stitch, but it is not actually part of the crochet stitch itself. Wrap your yarn around your hook (should already have loop on it) Next stick your hook through the stitch (like normal) make sure your tshirt is centered like I have the one below, before you pull the yarn through..........

Once your shirt is centered pull your yarn under and through the stitch...........

Just like this........

 Ok now you have 3 loops on your hook......... Right............... Now pull your yarn through all 3 loops.....
Ta Da!!!!!!! You not only know how to do a half double crochet, but you are now well on your way to a new rug!!!! You just continue the process around and around until you get it how big you want it. If you are having problems with curling at the ends, you can put 2 half double crochet stitches in each stitch there. I didn't have any trouble with that, I just made sure to adjust my tension (grip on the yarn) to where it was not so tight. It is working fine for me and I am in my 20 th round.
So that is all there is to this project. This is really easy! I will do this more than once........... If you have any questions don't hesitate to ask. You can comment here or go to my fb page Momma's Time Out. I am always glad to help. :)

Beginners- Single Crochet Stitch Part 2

Beginners - Single Crochet Stitch Part 2 
Ok a couple of days ago, I showed you how to make a single crochet stitch into a line at whatever length you chose. This is our line that we are going to work off of today to show you how to crochet more than just one row. Get your hooks ready! In this picture I am using a J hook and Red Heart yarn from Walmart. You can use whatever makes you comfortable.

 First you are going to stick your hook through the top of the stitch that you just finished, if you look below you will see two loops on the hook. I am getting ready to pull my yarn through one of those loops.....
Now the yarn I just pulled through the first loop is on my hook with the second loop that was already there. Pull your yarn through both of these loops............
This is what it should look like once you have done that. You will still have a loop on your hook and you are ready to repeat this process, until you are finished with this row.
Below you will see what it will look like once you have completed the entire row. .........
Now you are ready for the next row. Instead of going directly into the next stitch here you will chain one first, this means you will pull a loop through the loop that you have left from the last row..........
Ok now with this row you will stick your hook through the entire top of the stitch, as you can see it looks like there are three loops. This is how it should look when you work your stitches from here until you are finished with your project. ...................... ( everyone crochets differently, I am teaching you my way)
 Ok so you pulled your yarn through the stitch and now you should be showing two loops on your hook, you will pull your yarn through both loops and should have one loop remaining when you are finished with this stitch. .......... see not to hard, its the same as the last row. That is all there is to it.......... You just keep doing it this way until your finished with your row and then you start your following rows, the way I just showed you................
 This is what it will look like when you are done with your row, you will see three rows......... Keep practicing this and you will be a pro in no time at all. This stitch is actually used quite a bit, so it is important to be able to do it well...................


Ok that is all................ I told you it wouldn't be to hard. Now if your still confused or have any questions please feel free to ask under the comments section here or through the Momma's Time Out facebook page. Good Luck and if you finish a project with the help of my tutorials by all means please share them, I like to know that I am helping someone learn to crochet. :) Most of all have fun!!!

Sunday, January 12, 2014

Saturday, January 11, 2014

DIY Modge Podge Recipe

DIY Modge Podge
I have not found an all natural way to make glue yet, so this would not be toxin free. This would be a money saving post. Modge Podge is ridiculously priced. I had never used modge podge before and I wanted to do something different with my boys on Halloween, instead of carving our pumpkins we wanted to decoupage them. So I set out to find a way to make modge podge because I sure was not paying what the stores wanted for it.......... With me still????? Good keep scrolling, here is what I used.

Ingredients
50% Glue ( you can use Elmer's or the cheap stuff at the dollar store)
50% Water
1 Tablespoon of clear coat fingernail polish

Shake it up and store it in a glass jar.
Now here is why I know it works............................


DIY Muscle Rub

DIY Muscle Rub
I am sharing my muscle rub recipe with you all this evening, this is my baby. My pride and joy. An absolute necessary staple for my personal medicine cabinet. 
I have a very bad knee, which causes me to walk with a limp or catch in my stride. In turn every muscle in my body aches everyday. I could go to the doctor's and get pain meds and shots, but I choose not to. That is right I choose not to............. I have started my journey to eliminate as many chemicals as possible from not only my families bodies and lives, but my own as well. Without further due................

Ingredients
5 Tablespoons of Coconut Oil ( I prefer Tropical Traditions Gold Label) You can do your own research and decide which coconut oil you like the best.
10 drops of Eucalyptus Essential Oil ( I prefer Plant Therapy Essential Oils) You can do your own research to find out which oils you prefer to use. 
Mix well and store in a glass container in a cool place to avoid liquification.
* Note, I also make another batch of this with Lavendar Essential Oil, which is what you see in the picture. Both are effective. I choose Eucalyptus alot because it is known for it's anti-inflammatory properties. 
I apply this two to three times a day, depends on my pain level. 

I am not a doctor, always consult your physician before trying anything new. 

DIY Disinfectant- Window Cleaner

DIY Disinfectant - Window Cleaner
Yes, you heard it right! I make and use my own disinfectant that also doubles as a window cleaner. My young boys touch everything and well that is how germs spread. I wanted a cheap, but effective and toxin free disinfectant cleaner to stop germs in their tracks. I have been using this recipe for over a year now and I love it! I use it on all surfaces. I have used this on windows, tv's, desks, phones, and pretty much anything these kids touch! Especially during flu season. Here it is .......

Ingredients
Clear Spray Bottle
White Vinegar
25 drops of Eucalyptus Essential Oil

Instructions
I buy a clear bottle from family dollar, they are fairly large, tops are color coded, and there is an area where you can label and date with a sharpie. Fill it up with the vinegar halfway, add your Essential Oil, shake it, finish filling with vinegar, shake it again. There you go! Your done................ Easy Peasy!! 

Why do I use Eucalyptus Essential Oil? I use this oil because it is Antibacterial, antiviral, its an astringent, and it kills up to 70% of local bacteria called staphylococci. 


Heavenly DIY Eczema Cream

Heavenly DIY Eczema Cream
* Please remember, what works for my family may not work for yours *

Ingredients
1/4 c. oats 
3/4 c. coconut oil
1tbs. olive oil

I use the oats you get in the big round can, that can be purchased anywhere. I try to get all natural organic whenever possible. I also throw the oats into the food processor first. I try to get them as close to dust as possible. 
I use Tropical Traditions Gold Label Coconut Oil, but you can also use LouAnna coconut oil it is available at WalMart and some local stores have it. If they don't ask your local store if they can start ordering it. Most will when asked. I take the coconut oil and put it in a saucepan on the stove on med/low heat and add my near dust oats, I stir and let it mesh together. It will be a milky color when it is ready to take off of the heat. I add my Olive Oil right before taking it off the stove. Let it set and cool off a min and then pour into glass container. This will take several hours to solidify, once cool I usually put it in the fridge to speed up the process. I take it out and stir it really good. If you don't like the extra oatmeal,you can strain it out before you pour into your container. I happen to like it better with the oatmeal in , I think it works better. Your call, like I said before what works for my family might not for yours and that is perfectly ok. Store this in a cool place to avoid liquification. 
You can apply this at anytime.

Why We Use This
Myself and two of my boys, have eczema badly. My youngest use to have it the worse. Note* I said USE TO. Since I have incorporated coconut oil into almost all of the products I use, he does not get eczema the way he use to, which was being covered head to toe. Now he only gets around five patches on his body, which is a vast improvement. You will see results from this in the first 24 hours after use, the redness will completely vanish in about 2 to 3 days and the healing of the skin itself will start as well. 
I hope this post helps you! Good Luck

Superwoman Gift #1 - Why I Crochet


Superwoman Power #1 Why I Crochet

Good Morning,

I wanted to go in to detail a little bit with you all about one of my Superwoman powers ;) Crocheting. I am sure many of you are asking yourself why I crochet and how I find time to do it? 
Background
I have been crocheting since I was around 10 or 11 years old, I was taught by a blind woman who lived next door to me. She use to crochet with bread sacks and make rugs and purses. Anything you could think of I am sure she could do it. She was my inspiration, a very good teacher and one of the best mentors a girl could ask for. At first I was no good at it, but I never gave up. I am in my 30's now and I can crochet anything. I still haven't found anything that I haven't been able to crochet. 


I crochet because it helps me make money and it helps me save money, sometimes along the way if I am lucky I also get to teach someone to crochet to :) 
Making money helps me to be able to pay for sporting events, medicine, glasses, make homemade healthier products for my family, and to be able to buy more yarn, so that I can make hats, gloves, scarves, blankets and such for my boys and my husband. 
Saving money is important to me, by crocheting I get to help my family save money on products or items that we would have normally purchased at our local store. I make our own hats, scarves, gloves, blankets, booties, electronic device covers, purses, bags ect. That saves a huge amount of money, plus it last alot longer than the ones bought at the store. The money I make from my crochet also pays for the small things, which in turn saves us money because when I do our budget for the month I still add the small things into our normal budget, if I sell crochet that is great because it saves us money. Selling crochet also helps me get the supplies I need to make healthier, toxic free, health, beauty, and household cleaner products for my family. This saves us money because we do not take as many trips to doctor's and E.R's. We don't buy products I can make at the store anymore, that saves us a bundle. The products I make are not only toxin free, but the quality is excellent and the shelf life is longer than what is normally purchased at the store. 
I could go on and on and on, but I am pretty sure that your getting the idea. Everything that I do is done for my family, it's all linked together.

Now how do I find the time? Well let's just say I am extremely good at multi-tasking ;) Most of what I do is done within the two hour time frame that my youngest son is in school. I can crochet anytime, I could do that blindfolded. Everything else waits until all my boys are in bed, fast asleep. I run myself ragged and I am tired most of the time, but I wouldn't take any of it away for anything. I know that everything I do helps my family, I have seen the results, so it is not hard for me to push forward.
There it is ........ a little insight from my Crazy Life!!!!!

Friday, January 10, 2014

DIY Miracle Chest Rub


Note* What works for my family may not work for yours. I am not a doctor and you should always consult with your physician before trying anything new*

Miracle Chest Rub
Yes that is right I just called this Miracle Chest Rub because in my house that is exactly what it is. This is fairly easy to make, although I always caution folks that are new to the all natural or holistic remedies to make sure and do your research on the products that you are using or attempting to make.

Ingredients
Coconut Oil - I use Gold Label Pure Coconut Oil from Tropical Traditions, but if you cannot afford that you can use LouAnna. It is sold at WalMart
Essential Oils - I get all of my essential oils through Plant Therapy. This is where you will need to do your own research to find which company is the best place for you to get them.
Container- I prefer glass, it is easier to sanitize and I don't need to worry about chemicals leaching into what it is I am making. I do recycle and the ones you see in the photo above are indeed baby food jars. :)

Instructions
Chest Rub for Adults
5 tablespoons of Coconut Oil
10 drops of Eucalyptus Essential Oil (organic)
10 drops of Peppermint Essential Oil ( organic)
Mix Together really good in a bowl or you can do it directly in the container. I store mine in a cool place, if the temperature is to high where you store this, it will liquefy. It does not lose effectiveness if this happens, but some people do not like when it liquefies.
Chest Rub for the kids
Whatever I make for Adults in my house, I cut the essential oils in half for the kids
5 tablespoons of Coconut Oil
5 drops of Eucalyptus Essential Oil (organic)
5 drops of Peppermint Essential Oil (organic)
Mix together very well and put in container. Store in cool place.

When I make this for my family, I label and date it. The last container of this I made was used on 5 people and it lasted 11 months. No change in effectiveness at all.

What do we use it for??? At the first sign of sickness I apply this to the chest, back and soles of the feet twice daily, once before bed and again when they wake up. This stuff will knock out a cough and a fever quickly. I call it miracle rub because truly it is, we have used it for colds and the flu and it works in record time. This will always be a staple in my medicine cabinet.
Did I mention you will save money?????? I also only purchased 2 bottles of Tylenol and IB last year, which is a miracle for me. We normally buy way more than that a year, especially if flu season is bad.
I hope you enjoyed my post!

* Always consult with your physician first*

DIY Make- Up Remover


I get a little frustrated when I walk into the cosmetics aisle in the stores and see all their chemical filled products in pricey little containers. Here is one item I will not have to EVER buy again. This is the easiest diy beauty product to make that you will kick yourself in the rear after you make and try it. Are you ready????.....

BPA free plastic container ( I prefer glass) ( the one pictured above was the very first one I made 2 years ago)
lastly - Coconut Oil

That's it................... Use the edge of a washcloth or a q-tip to apply to the areas that you want removed and it comes right off. The best part, it does NOT burn your eyes and coconut oil is extremely good for your skin.
I keep mine in a cool place because if you have ever used coconut oil then you know that if it reaches a certain temperature, it will liquify. It still works just fine as liquid or solid, I just thought I would share what I have learned.
I hope you enjoyed this post!